
4-link & coilovers: design, install & tuning
After many years of running leaf springs on the rear of your ·85 4Runner, you finally decided it was time to build a proper rear 4-link with coilovers. This page walks through how you designed the suspension with a 4-link calculator, built it using available parts and Barnes4WD brackets, and tuned the coilovers for the ride and flex you wanted.
Why switch from leafs to a rear 4-link?
After many years of running leaf springs you decided to link the 4Runner in the rear. From a fabrication standpoint a 4-link is fairly straightforward to build, but the design work is where the real challenge is.
You didn·t want to spend the money on an off-the-shelf kit, especially since you already had links and coilovers on hand from parting out another rig. That pushed you toward a custom setup: more time in the garage and at the computer, less cash out of pocket.
Planning the geometry with a 4-link calculator
Before cutting anything off the truck, you spent a lot of time bouncing between the 4-link calculator and crawling around under the 4Runner. The goal was to get numbers you liked on paper while still being realistic about what would actually fit on the frame and axle.
Like most link setups it ended up being a balance between ·ideal· geometry and packaging realities: compromise, compromise, compromise.
You used this spreadsheet-based calculator to model the rear suspension:
4-link suspension calculator DOWNLOAD
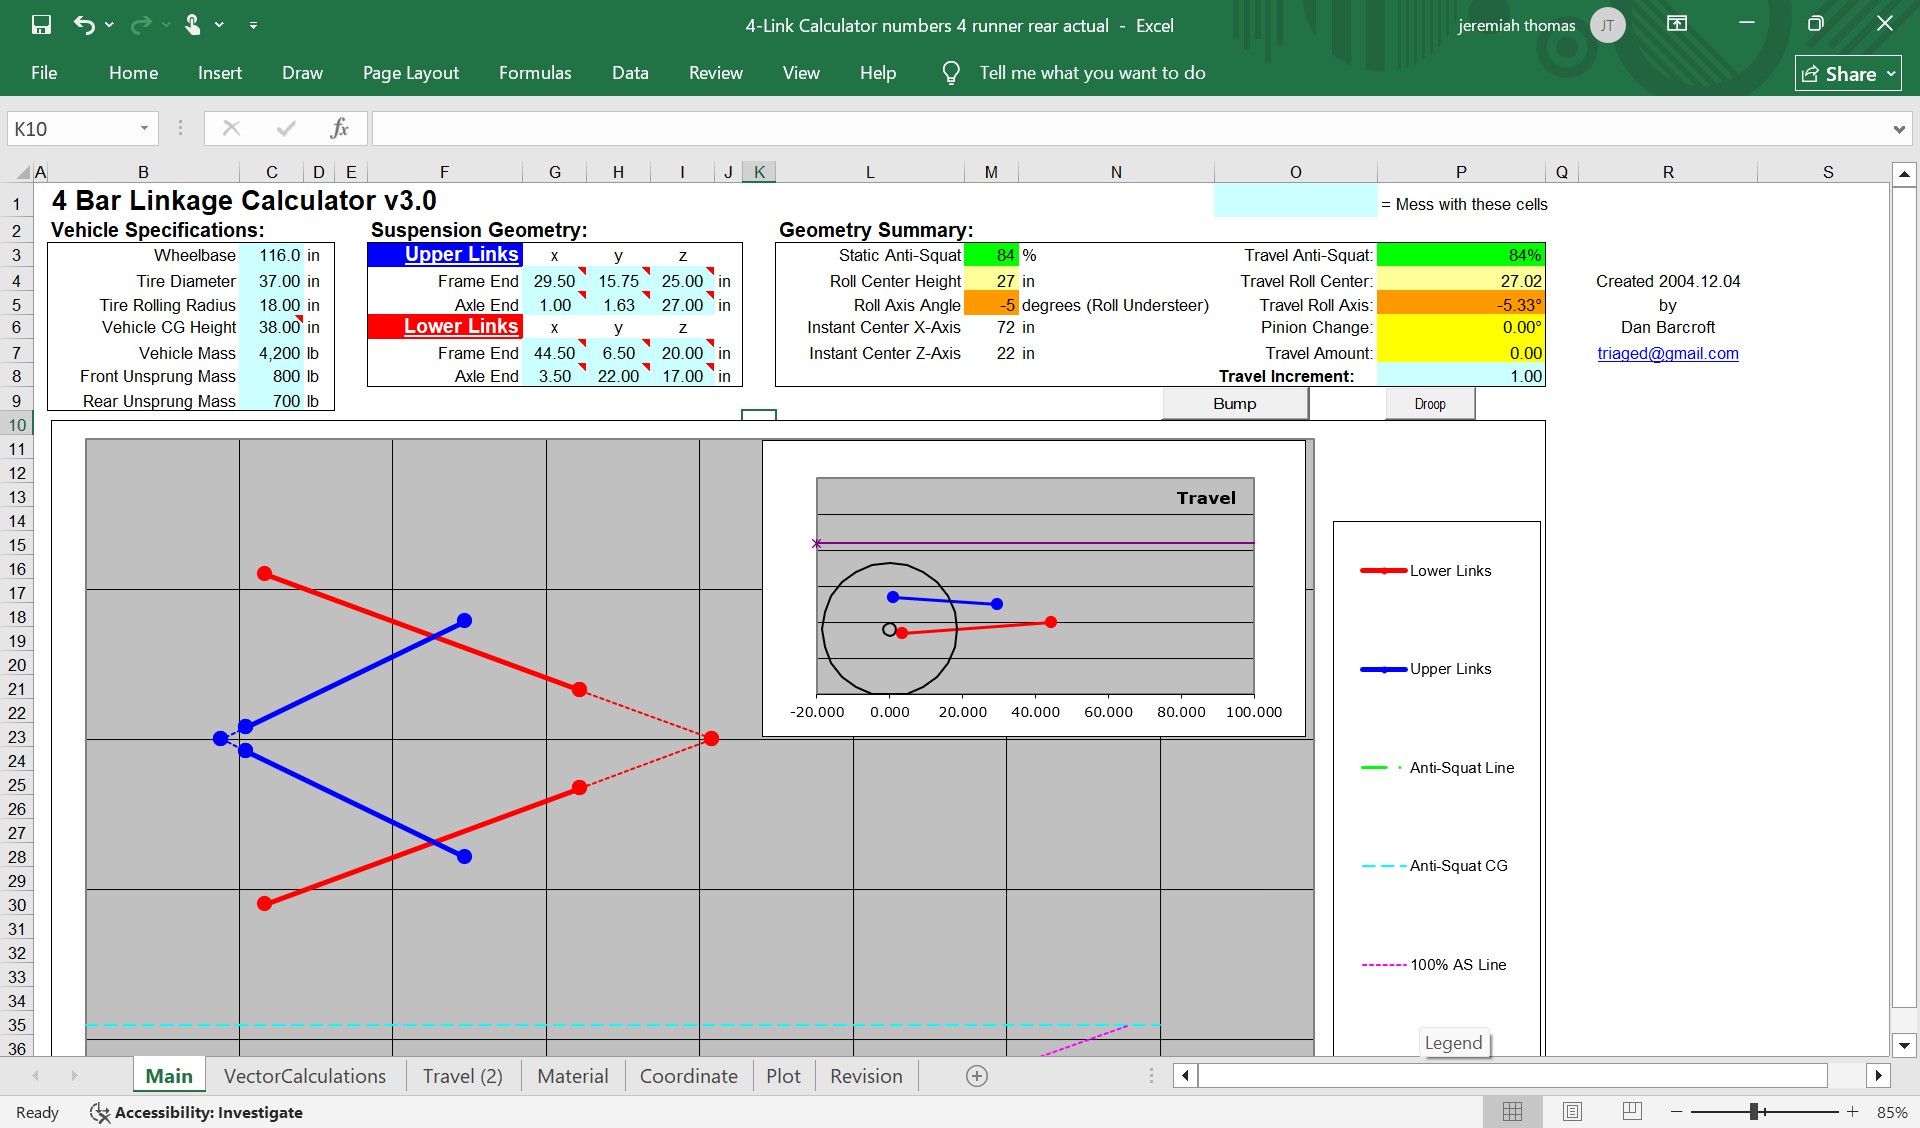
Link lengths, materials & layout
After working through different options you landed on a double-triangulated rear 4-link with:
- Upper links: 32" long
- Lower links: 41" long
- Link material: 2" x .25" DOM tubing
- Joints: 1.25" chromoly heims at each end
The upper links on the frame side are mounted to an adjustable bracket that gives you three different mounting positions. Each position has a noticeable effect on the anti-squat percentage, so you can fine-tune how the rear end behaves under throttle once the rig is together.
Building the brackets & cycling the suspension
With the design locked in you ordered the link brackets from Barnes4WD and started tearing the rear leaf-spring suspension off the truck while the parts were in transit.
Once the brackets arrived, construction followed the usual pattern:
- Tack the brackets and links in place
- Cycle the suspension through bump and droop
- Check clearances and adjust as needed
After a few rounds of cycling and tweaking you were happy with the placement, so everything was burned in with lots and lots of welding.
Coilover packaging & spring rate tuning
With the links done it was time to hang the coilovers. You·re running Fox 2.0 x 18" remote-reservoir coilovers · more shock than the truck really needs, but they were on hand so you made them work.
The first big challenge was frame clearance. To package the coilovers and keep the tires off them at full flex, you ordered a set of beefy shock towers and frenched them into the frame. That pulled the coilovers inboard enough to clear the tires while still giving good motion ratio and travel.
You targeted about 6" of up-travel and 12" of down-travel. Getting the spring rates right took a few attempts. You ended up needing tender springs because of the preload required to hit ride height, and you settled on a 100 / 250 lb/in spring combo.
On paper the math suggested a 100 / 150 stack, but in practice that was way too soft for your driving style, so you went stiffer. The setup works well now, but you may still tweak the rates in the future.
Trail manners & overall results
Compared to the old leaf-spring setup, the rear of the 4Runner rides much nicer now. Small and medium bumps are soaked up instead of being kicked through the chassis, and the rear end stays more composed at speed.
- It flexes extremely well over rocks and obstacles
- Traction on climbs is noticeably better
- The ride quality on trail is a big improvement over the leafs
You·re happy with how the rear 4-link and coilovers turned out · now the front suspension is eyeing you for its turn.
← Back to Tech Overview